REST based access calls
If you have no keys for your project then create a new "Application" from "Manage Platform" and then "Applications".
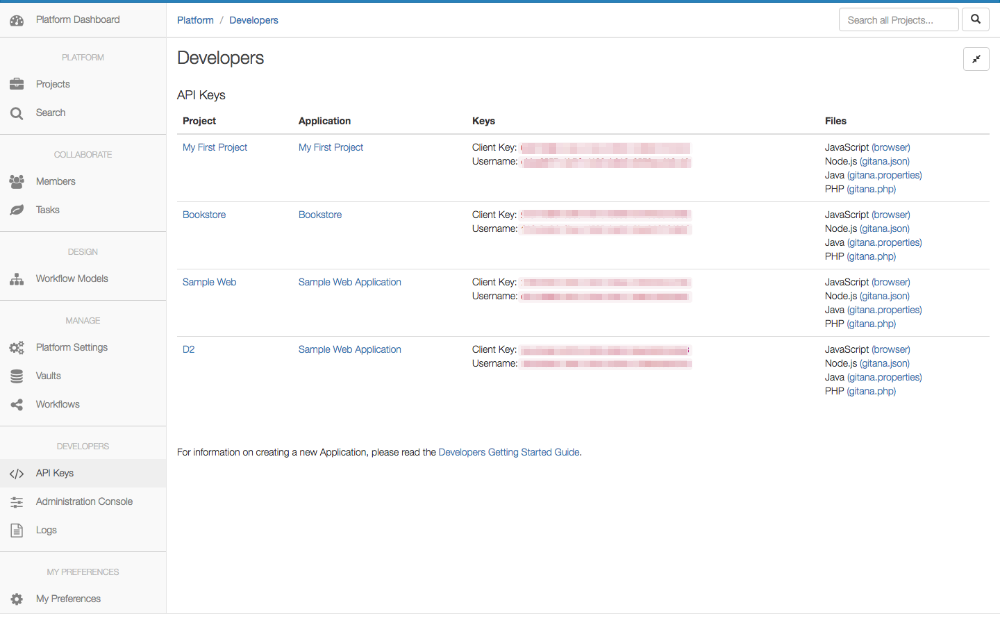
Now click on the desired project's entry named "Node.js (gitana.json)" to see your keys. It will look something like this:
{
  "clientKey": "51371da0-b389-4b73-84c9-d1295ee1da8a",
  "clientSecret": "/qHWNstDHZYkYxQvSIN6jZkIebxPDxT2IhH/4SQ/DdVJMwB42pHbLbQ1/GA9Plu1vSJ3tC5JbCYz0RfHCtxKrh2SAXr0uKGLJOwIXyVFvnA=",
  "username": "f4fc3c6d-fbae-4525-be54-2ba94f7fd00f",
  "password": "axpJDZRtFTiPgOLOwiUciG7sHDpwdmOykidBUV8BiJNAxNrciClhgnT+uoVv5v0bIhS9AmqUvmmKj4KUnSVRFt+1B9Tu89AefFKJ9MhhMa0=",
  "baseURL": "https://api.cloudcms.com",
  "application": "81e85f203ba8ee01f559"
}
The Cloud CMS API calls are protected so they require an oAuth bearer token. So we must first retrieve this token. Any REST API client (like POSTMAN or Advanced REST Client) will work. We will use Advanced REST Client.
We'll need to use HTTP Basic Authentication for the initial API call to retrieve the oAuth bearer token. Basic auth requires an "authorization" header whos value is the base64 encoded concatenation of a username followed by ":" followed by a password. The user name we use is the "clientKey" field of your set of keys from Cloud CMS. The password is the "clientSecret".
Tools like ARC will handle the base64 encoding of the authorization header for you. If you are using a tool that does not do then you need to generate the header yourself using the clientKey as the Basic auth username and clientSecret as the Basic auth password as follows:
Manually base64encode (clientKey + ":" + clientSecret), yielding a concatenated value similar to this. This will be the value of your "authorization" header:
51371da0-b389-4b73-8359-d1296dd9da8a:/qHWNstDHZYkYxQvSIN6jCkIebxPDxT2IhH/4SQ/DdVJMwR66pHbLbQ1/GA9Plu1vSJ3tC5JbCYz0RfHCtxKrh2SAXr0uKGLJOwIXyVFvnA=
Online encoders such as this can help with encoding the authorization header field.
We will use the build-in auth feature of Advanced REST Client which does the base64 encoding for us.
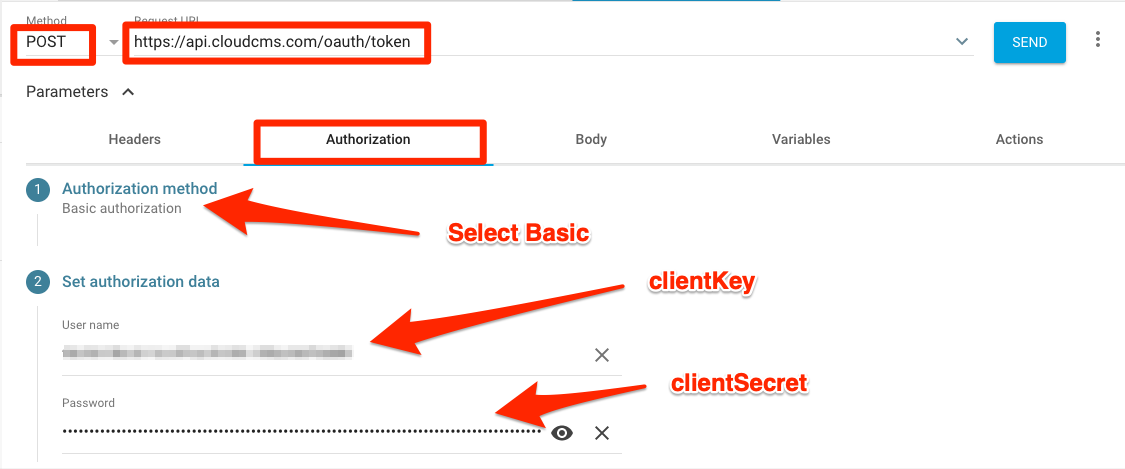
Create a Request and set the Method to POST and the URL to https://api.cloudcms.com/token
In the Authorization tab, Select "Basic Authorization". Enter your "clientKey" in the User name field and "clientSecret" in the password field. You can see the authorization header is now set for you if you click on the "Headers" tab.
Now enter the fields required by the oAuth password flow in the "Body" tab.
Select "application/x-www-form-urlencoded" as the Body content type. Then add 4 FORM PARAMETERS as follows: "grant_type" with value "password", "scope" with value "api", "username" with the value from the "username" from Cloud CMS keys, and "password" with the value from the "password" from the Cloud CMS keys.
Now click on "ENCODE PAYLOAD". This will HTML encode the password field. Only click this button one time. If you click it again then the encoded value will be encoded. Not the original value. If you're not sure if you clicked it already then re-enter the password field and click "ENCODE PAYLOAD" again.
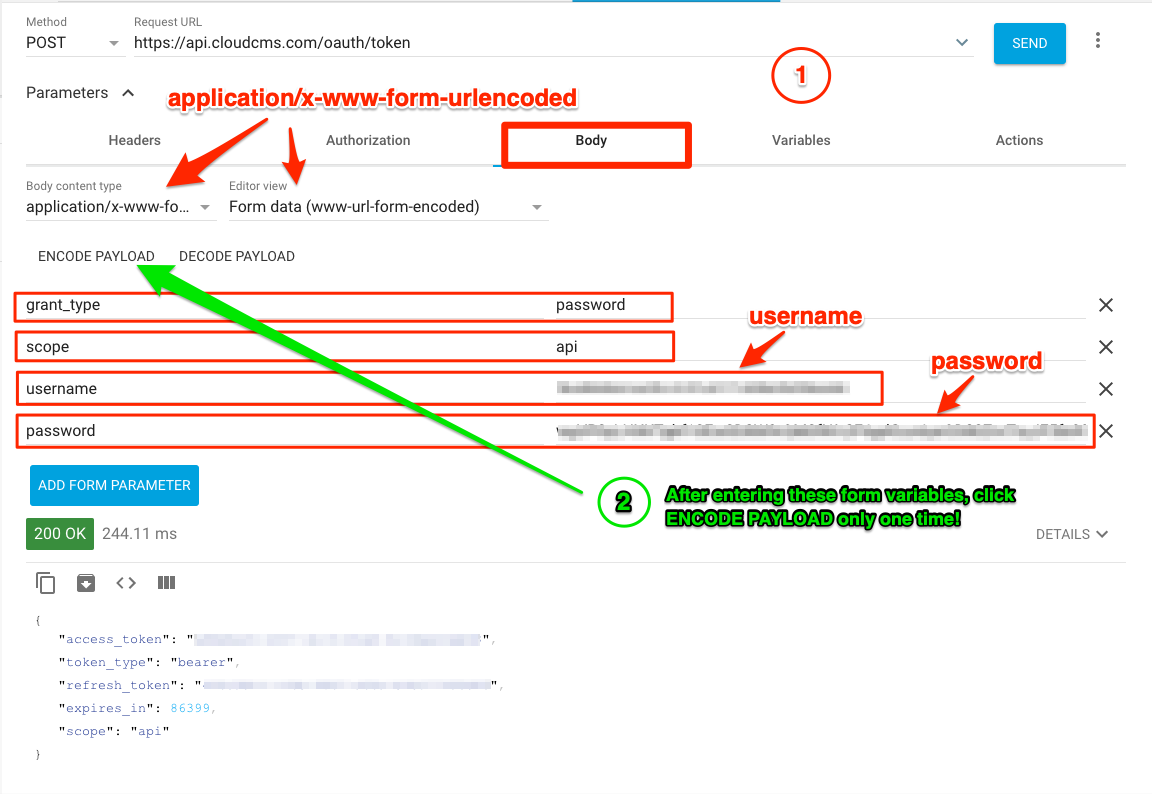
Now click "Send" and the API endpoint will be called and you should see a response code of 200 and a JSON response payload with "access_token", "token_type", "refresh_token", "expires_in" and "scope".
"access_token" is the bearer token you will now use for subsequent API calls. This now permits you to utilize any of the calls listed at https://api.cloudcms.com/docs
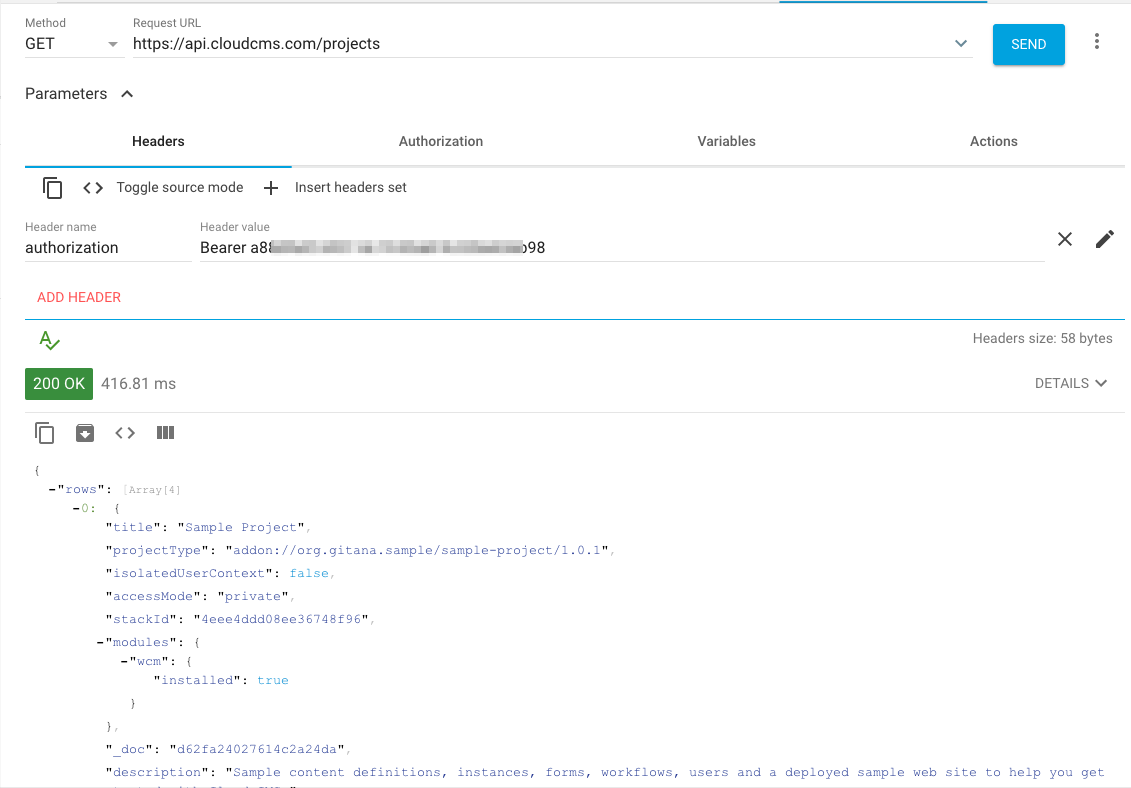
We can test this now by calling the /projects API endpoint.
Create a new Request in Advanced REST Client. Set the method to GET and the URL to "https://api.cloudcms.com/projects. In the Authorization tab, set Authorization to "No Authorization". Then in the Headers tab, create a header called "authorization" (if it does not already exist) and set it's value to "Basic access_token". Replace "access_token" with the access_token received in the previous step. Now click "Send" and you should see a response which lists projects.
Use this same "authorization" header to call any API endpoint.